
Summary: Ziflow supports a wide range of file types to help you and your team tackle all types of creative projects - including video & audio.
While collaboratively reviewing videos, you can use all of Ziflow's markup and annotation tools. You can also use the commenting and feedback capabilities, which streamline the entire review and approval process.
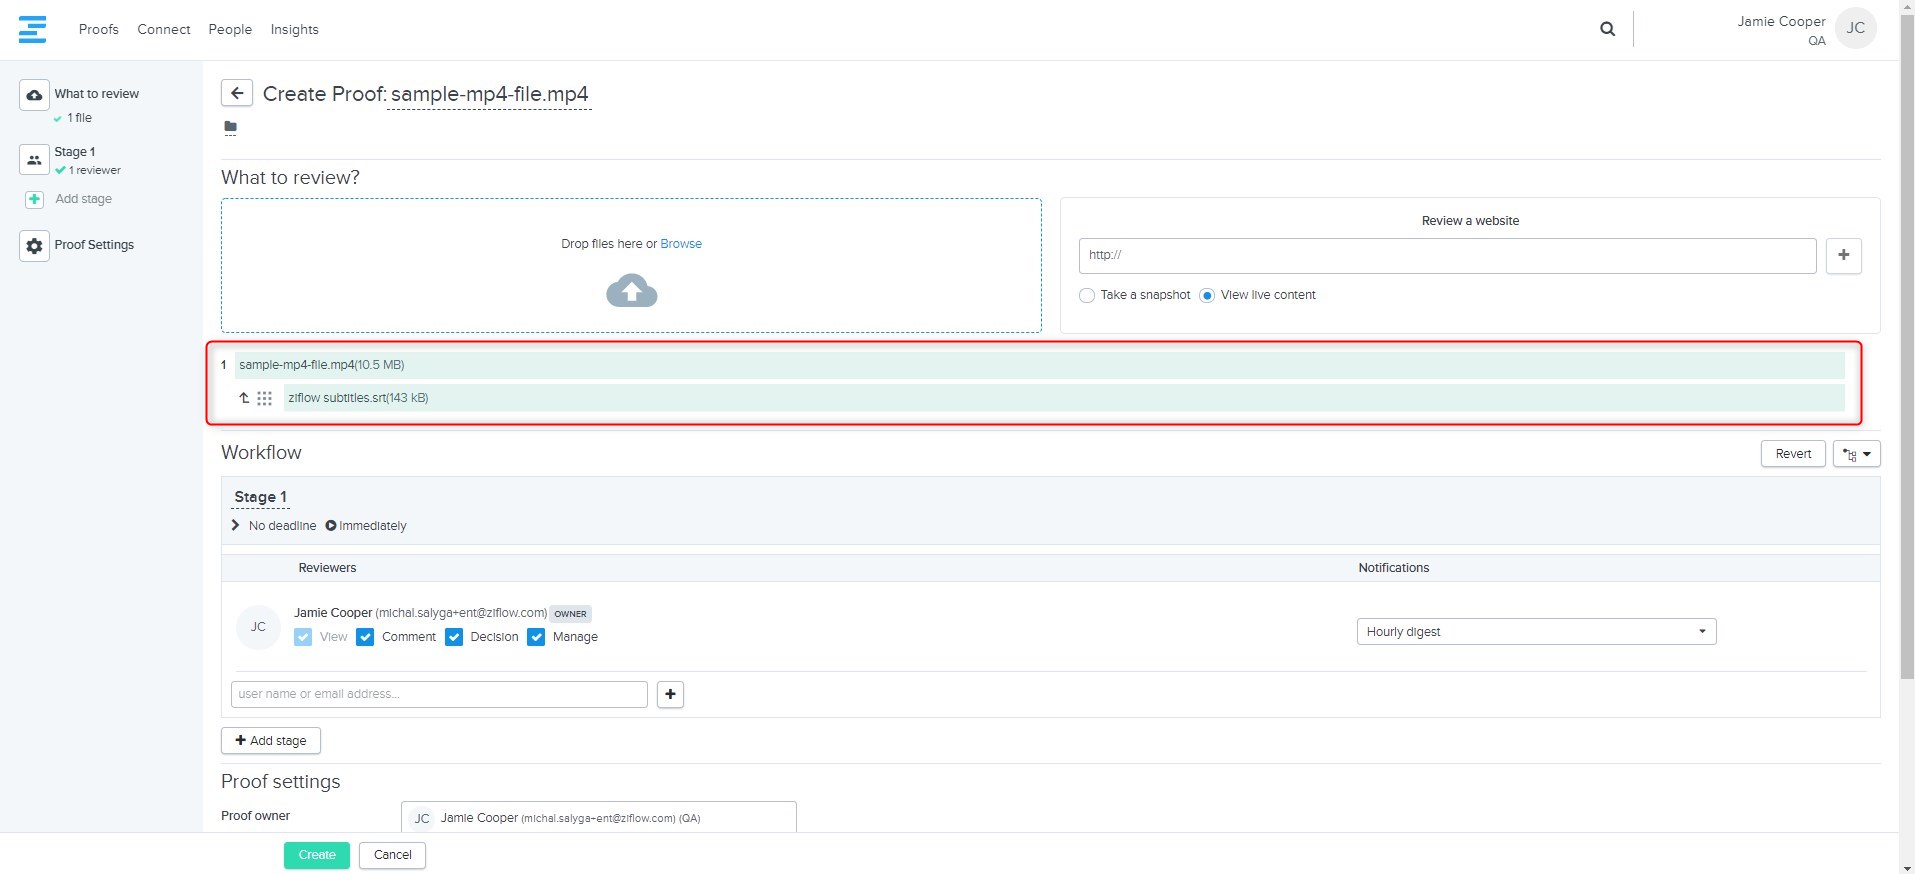
Adding a subtitle to the video when creating a proof allows review and comment on subtitles synced with the video.
Available for: reviewers with View permissions. Every reviewer that is added to a proof will automatically have View permissions.

How does it work?
The Video & Audio Proof Viewer is designed to look and feel the same as the standard Ziflow Viewer, with a few different features.
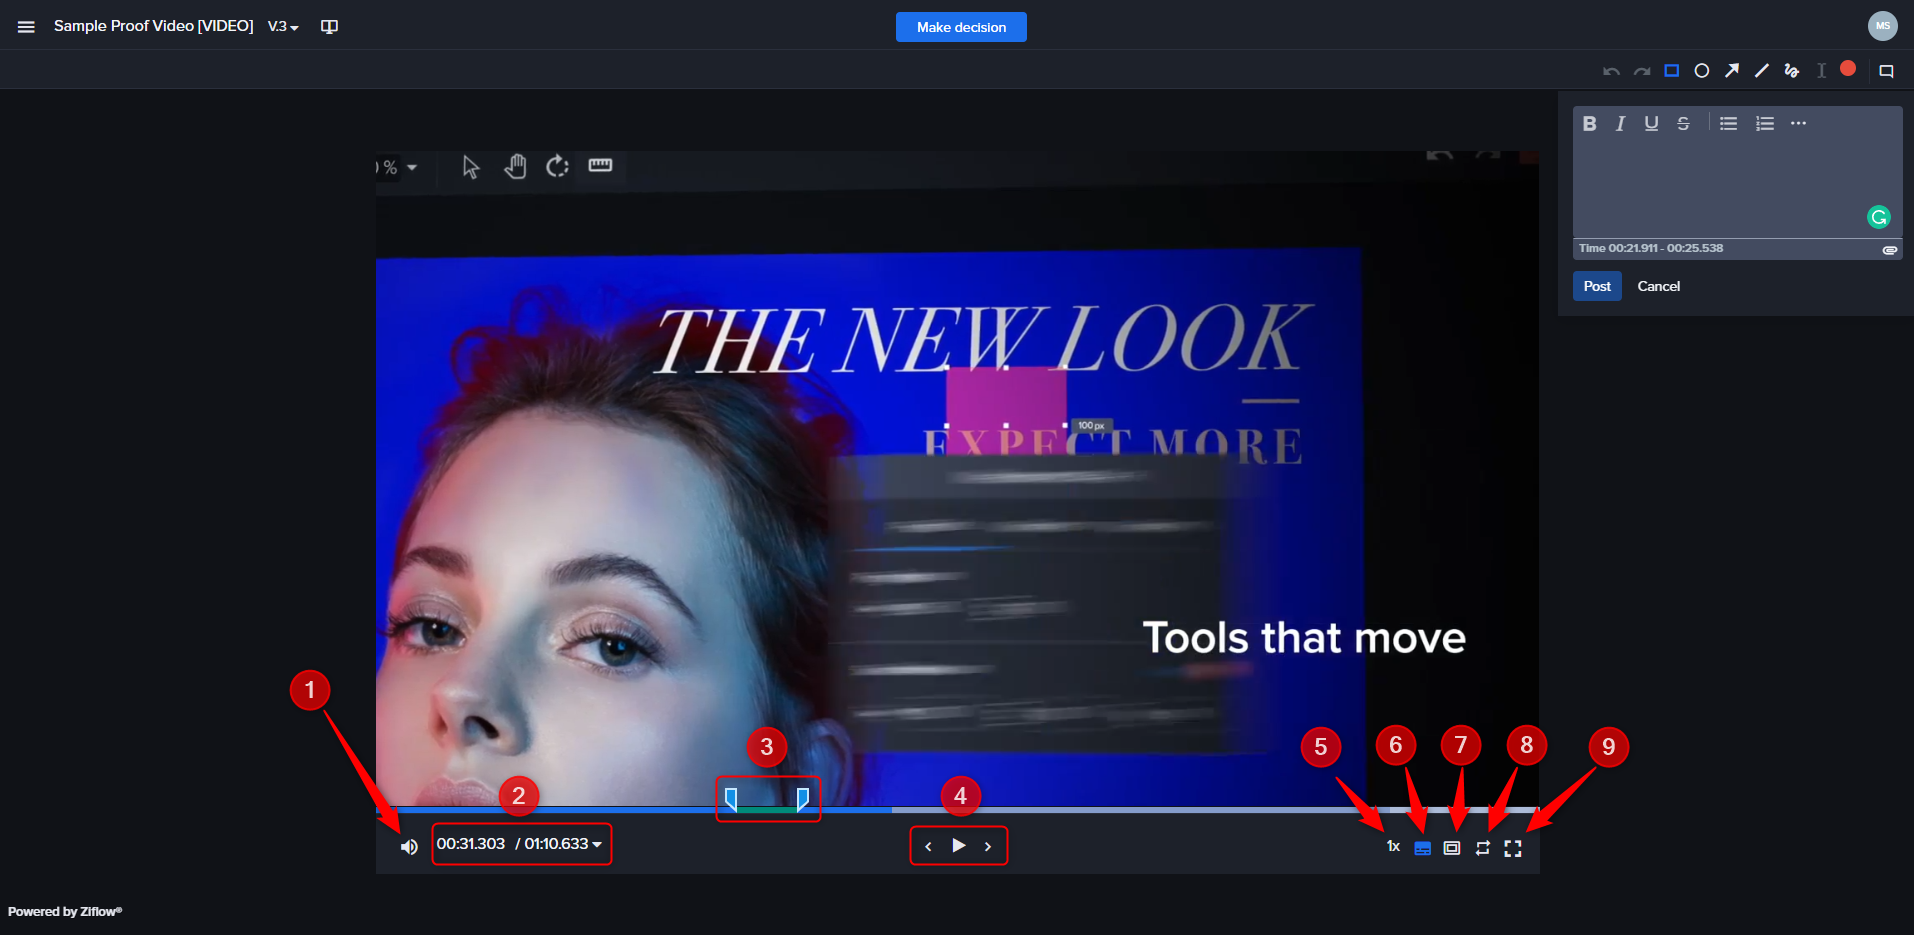
Volume & mute - this button increases or decreases the sound. This button can also be used for muting the sound.
Timer and time format - the first set of numbers shows the time elapsed, followed by the total length of the video. You can also decide in what format the timer should be displayed: Time, TimeCode, and Frames.
Range-based comments - if you need to add a comment that refers to some part of the audio/video file, you can adjust the starting and ending point of the comment by moving comment indicators. The indicators' range timeline will be additionally added next to the comment. Every comment (with or without range added) will show a timestamp beneath the video progress bar. Every comment timestamp shows the avatar or initials of the person who added the comment.
Play/Pause & Skip to the next/previous frame - The play/pause button allows you to start and stop the video. Alternatively, you can hit the space bar, which will work like clicking the play/pause button.
Left and right arrows let skip a video to the next/previous frame.Playback speed - click this button to increase or decrease video speed.
Subtitles - if subtitles were added during proof creation, this button will let reviewers switch them on/off during video playback.
Safe zones (Standard, Pro, Business Legacy & Enterprise feature only) - let you see how the video will look with different safe areas displayed on the video image.
Loop - this button allows you to put a video on a loop, and it will start the video automatically once it reaches the end.
Full-screen mode - opens a video in full-screen mode.
Video range-based comments
While adding a comment to part of an audio/video file, adjust the starting and ending point of the comment by indicating a range of the timeline that the comment pertains to.

When leaving comments using the range-based commenting feature, a timestamp is automatically saved within the comment. This helps provide context for reviewers and makes it easier to track changes.

For greater precision, hold down Shift while dragging comment pointers to adjust start and end points precisely.

Reviewers can also drag the whole range of the range-based comment. Simply hover your mouse over the green line under the time lane and move it using a drag-and-drop with your mouse.

If you want to move the play head to the beginning or end of your range-based comment, simply click on the left or right of the range. This will move the play head accordingly to your selection.

Additional information:
The exported file will display captions under the markup thumbnail when exporting comments to PDF from a video proof that includes subtitles.
