
Summary: This Zibot will automatically notify a preselected list of channels or people in your Slack workspaces about files being added/removed, or modified inside your Google Drive/Dropbox. The Email Zibot can be used in a single flow or as part of a multi-step flow.
Where is the feature setup? The Slack Zibot can be applied inside the Zibot step when creating or amending a Flow. In addition, Ziflow can automatically send email notifications based on your cloud storage events. Please Note: The Slack Zibot will only show if you have connected Slack to Ziflow.
Follow the instructions:
Send a File/Message to Slack Zibot Event configuration.
Before you create your first automation, you’ll need to connect your Google Drive/Dropbox personal/Dropbox Businesses. Start by entering the Connect tab and pressing a Create flow button in the upper right corner of the dashboard. Next, name your flow (e.g., Send each uploaded file to our Production Slack channel) and select a previously added cloud storage connection. Alternatively, you can also add a new cloud connection from this page.
Next, select a type of event that is going to trigger the automation:

There are four types of events (4th one which is New folder is created is dedicated to other Zibots):
File is added to a folder - select this event if you want to notify or send files being uploaded to the storage.
File is modified - select this event if you want to notify or send about files that are being modified (e.g., name is changed).
File is deleted - select this event if you want to notify or send files removed from the storage.
New folder is created - select this event if you want to notify about a folder being created in the storage.
Let’s now Set up details for your event. Please see “Understanding event settings” for more information.
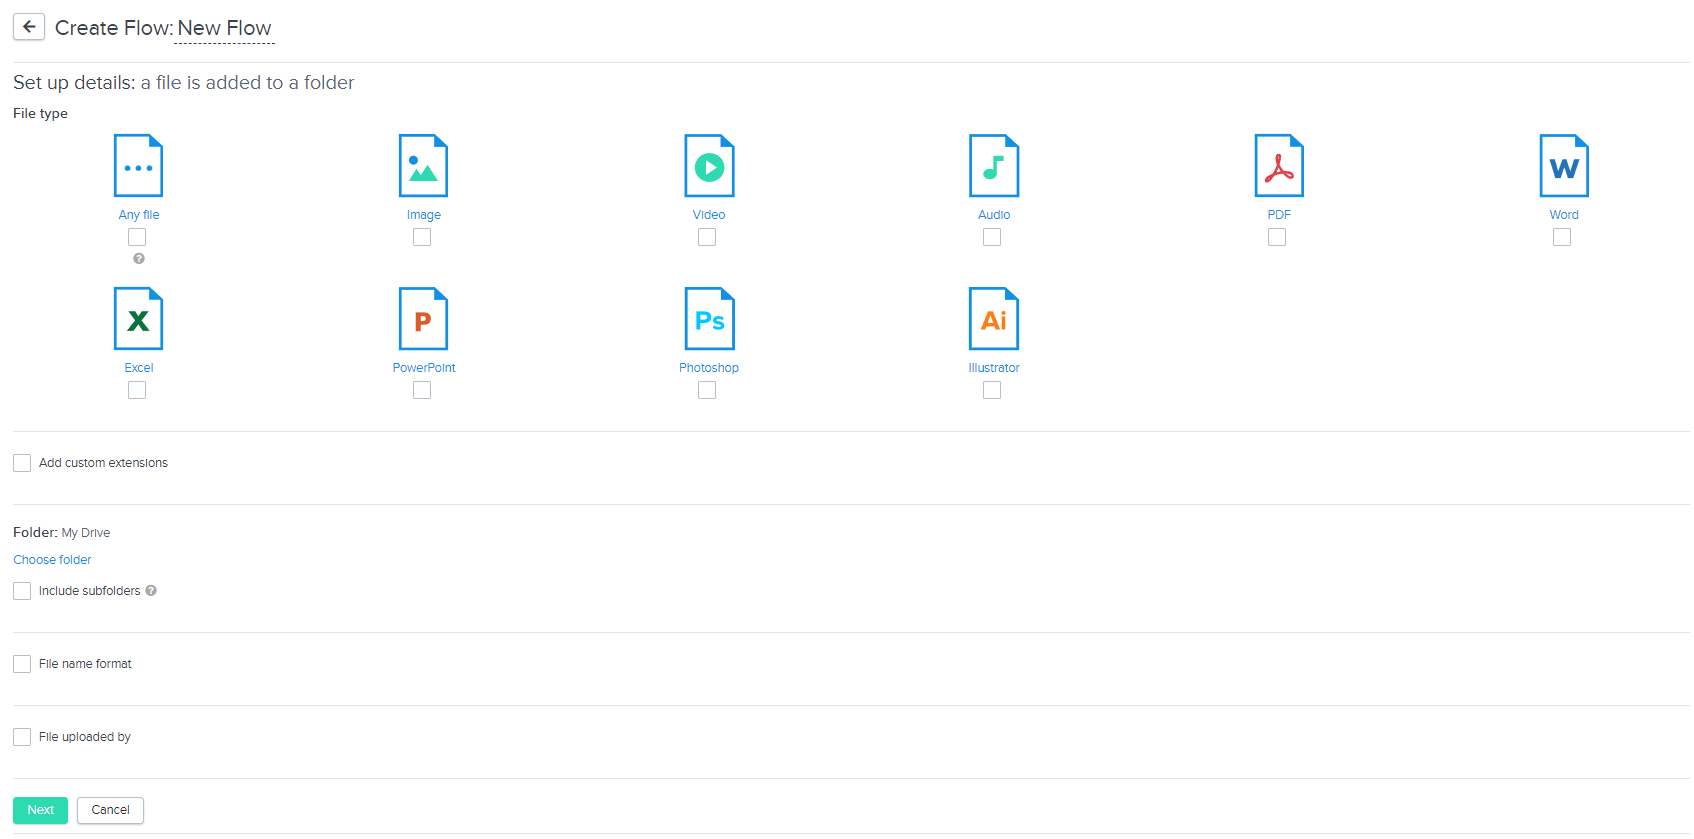
The above settings let you narrow down files that will trigger the automation later. You can decide which files, uploaded, where and by whom will trigger later actions. Once you’re done adjusting the trigger settings, click the Next button and proceed with the Zibot configuration.
Send a File/Message to Slack Zibot configuration.
You’ll be presented with a list of available Zibots. Select the Send a message/file to Slack option.
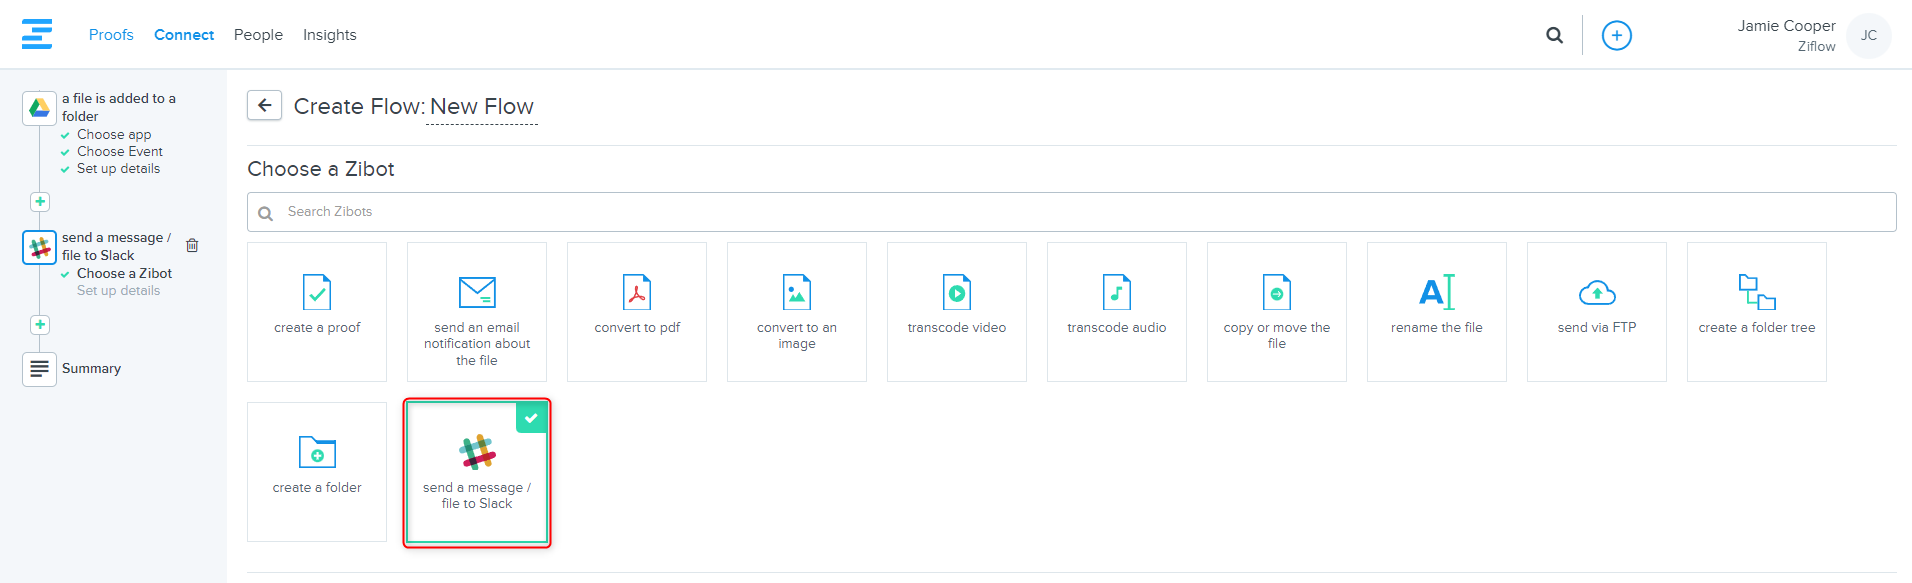
When you select the Send a message/file to Slack action as part of your flow, you will see the following window.
The configurable options inside the Slack Zibot are listed below:
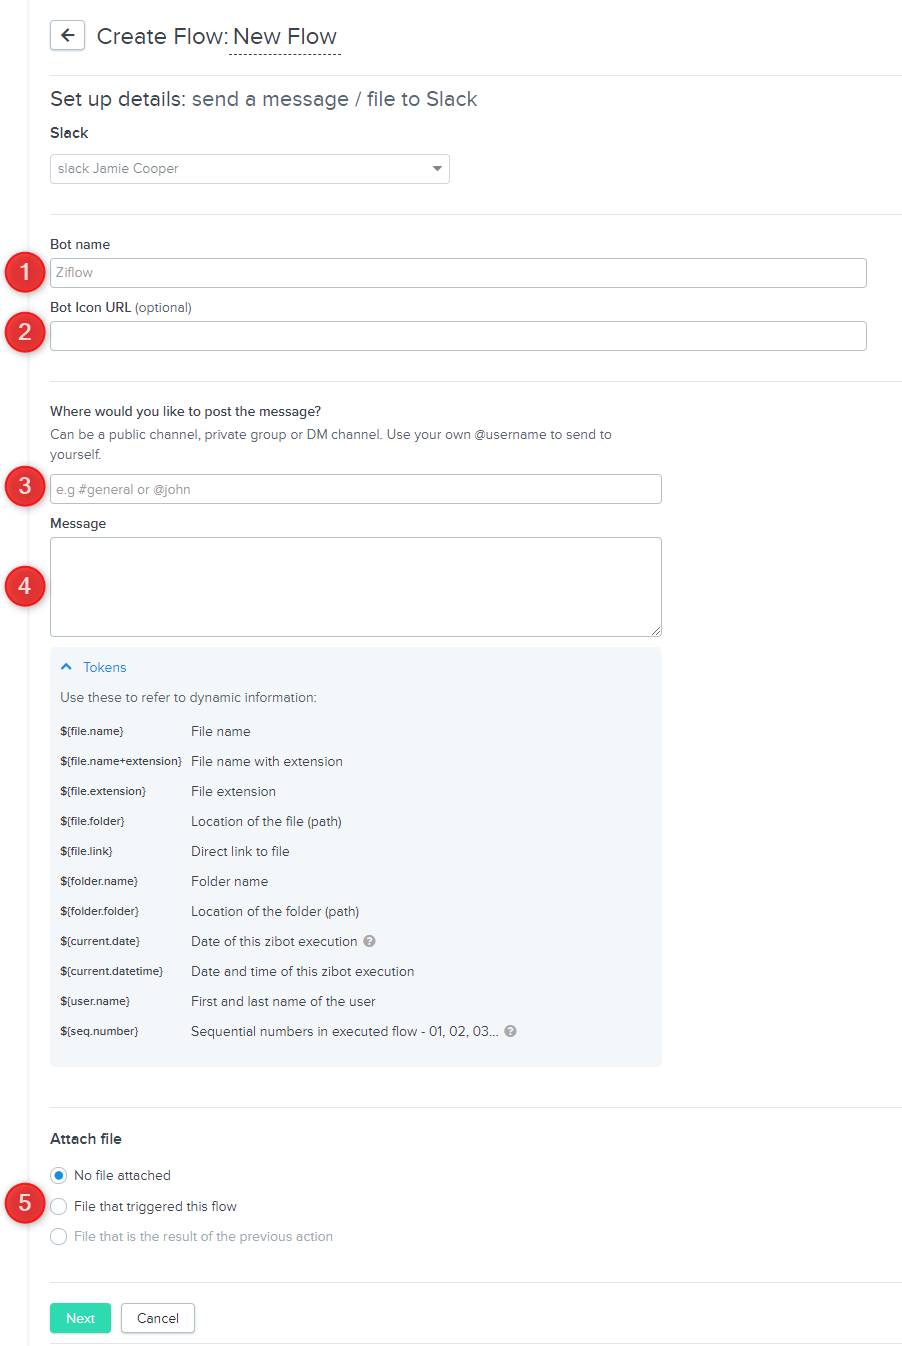
Bot name - Ziflow asks what you want to call the bot that will post messages or files to your Slack workspace. (By default, we enter Ziflow)
Bot icon URL - This field is optional, but you can post a URL to an image that can be used as your bot avatar inside Slack.
Where would you like to post the message - The Slack Zibot is asking where to post the message. It can be a public channel, a private group, or a DM channel. You can even use your @username to send it to yourself.
Message - Enter the message that will be posted in Slack. Tokens can be used to add specific information to your message. For more information on tokens please review FAQ: How to use tokens.
Attach file - You have the option to attach a file in Slack:
Select “No file attached” if you don’t want to attach a file.
Select “File that triggered this flow” if you want the Slack Zibot to attach the file that started the flow to be sent with the message in Slack.
Select “File that is the result of the previous action” if you want the Slack Zibot to send the file created in the previous Z action to the message in Slack.