
Summary: The Ziflow integration with Oracle NetSuite makes connecting your proofs to your CRM/ERP activity easy. Using the NetSuite Zibot, you can trigger proof review and approval project tasks directly in the NetSuite platform when new proofs or new versions are created. When a new proof or version is created, the Zibot will pass along the following task data in NetSuite:
Task name with simple text and JsonPath data
Status
Constraint type
Estimated work
Finish no later than
Assignees
To start sending information from Ziflow to NetSuite, you will need to integrate both applications.
Where is the feature applied? Click on Connect -> Applications and select Netsuite from the Connect Application list.

How does it work?
Once you have selected Netsuite from the list, you must fill out all necessary fields to connect both applications.

Please take note that integration requires the following values to be set:
Account number (Setup -> Setup manager -> Company information -> Account ID)

Consumer Key
Consumer Secret
Token ID
Token Secret
To use the connection, the following things need to be done:
Enable Token-Based Authentication
Create Integration record
Create a Role and assign it to a User
Create an Access Token for the Integration record, User, and Role
To have a fully working NetSuite connection, please follow the steps below:
Go to Setup > Company > Enable Features > Suite Cloud > Manage Authentication.
Enable Token-Based Authentication.
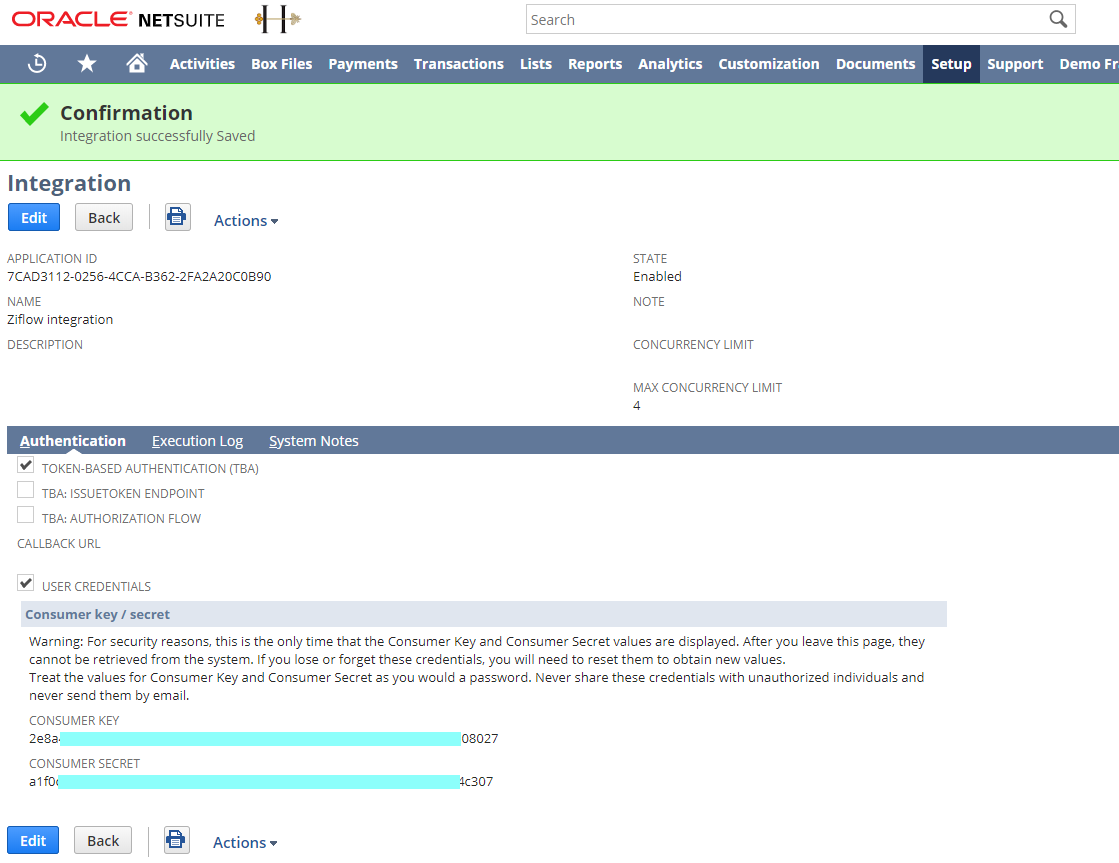
Now create an Integration Record as shown below:
Go to menu Setup > Integrations > Manage Integrations.
Tap the New button.
Set the name to Ziflow integration. Please make sure to tick the Token-Based Authentication option.
Please copy Consumer Key and Consumer secret values for application connection configuration.
Please take note that Consumer Key and Consumer Secret values are displayed only once, so please make sure you copy them before going to another page.
Now create a Role and assign it to a User below:
Go to Setup > Users/Roles > Manage Roles > New.
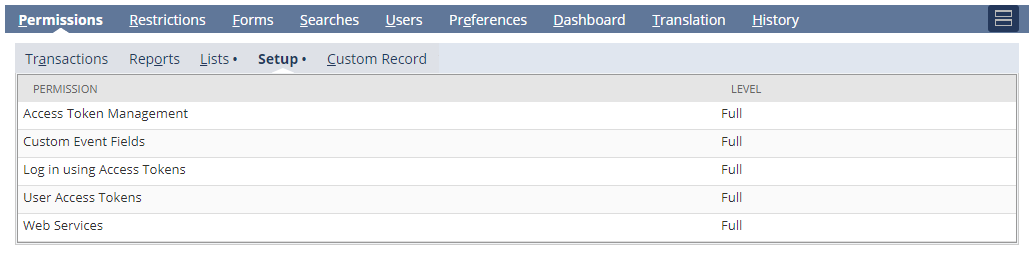
Create a role and assign necessary permissions for Ziflow integration.
The role must have several permissions set up:
Project Tasks - Full
Projects - View
Resource - View

Lists permissions
Setup permissions

Access Token Management - Full
Custom Event Fields - Full
Log in using Access Tokens - Full
User Access Tokens - Full
SOAP Web Services - Full

Assign the Role to the desired user that will be used for integration. Go to Lists > Employees > Employees > Edit user > Access tab > Roles subtab.
Please remember that role permissions propagation might take some time.
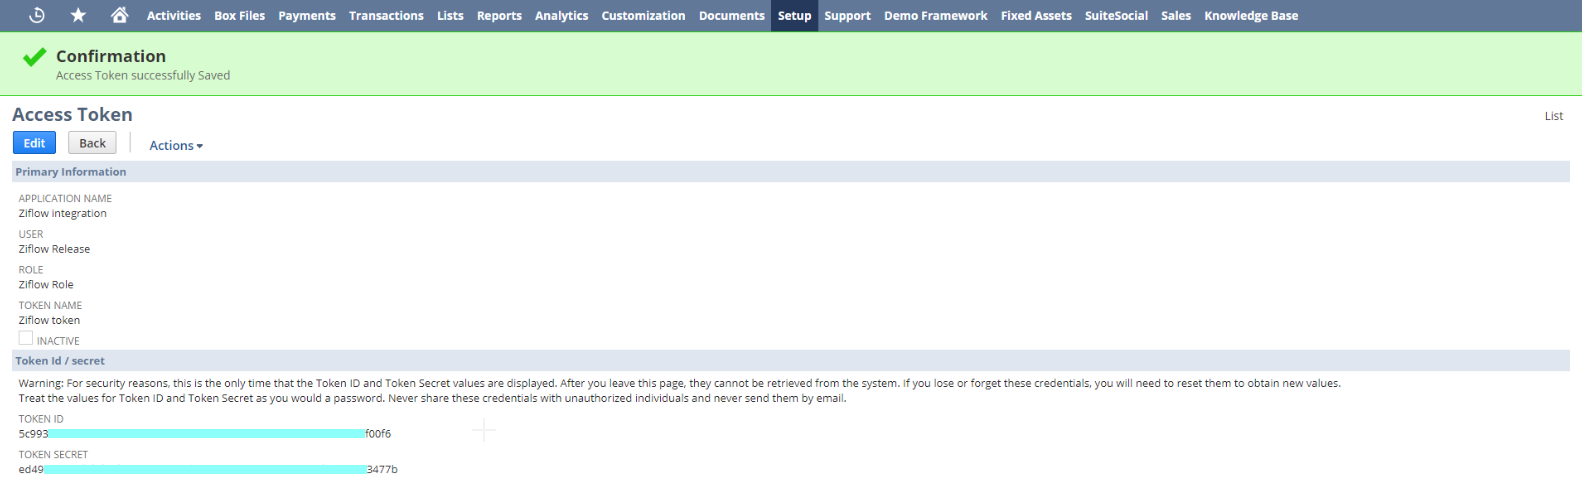
Create an Access Token for the Integration record, User, and Role.
See below how to create an Access Token for the Integration record, User, and Role:
Go to Setup > Users/Roles > Access Tokens > New.
Select the Integration record, User, and Role created or referenced in the previous steps.
Token Id and Token Secret will be displayed after tapping the save button. Please copy the Consumer Key and Consumer secret values to be used in the connection process.
After the above steps are completed, you can now use the Consumer Key, Consumer Secret, Token ID, and Token Secret in Ziflow's Connect to NetSuite window.
Additional information:
To send information from Ziflow to Netsuite, you must configure a Zibot that will automatically create Netsuite tasks. Here's an article explaining Integrating with Netsuite using Webhooks