Print is unforgiving in a way screens just aren’t. There really isn’t a hotfix or quiet swap for an error that you can do. Once forty thousand boxes come off the line with a drifted Pantone and the net weight sitting wrong for one of your markets, your options are a recycle bin and a costly reprint.
Which is what makes proofing print and package design its own particular kind of pressure. Everywhere else, a mistake is embarrassing, but here it's physical and pricey. And the mistakes that get you are rarely the ones you'd expect. It's the version that went to the printer before Legal signed off, or the color that looked fantastic on a backlit monitor and landed wrong under fluorescent store lighting. Both of these are process problems, and every one is preventable before it reaches a press.
What we'll cover
Table of contents
- What is print and package proofing?
- Why print and package review is hard to get right
- The four review stages every print project needs
- Print and package proofing checklist: what to check before press
- How Ziflow handles print and package review
- How to know your artwork is ready for press
- What we’ve seen at Ziflow
- Build the process before the press run
- FAQs
What is print and package proofing?
Print proofing is the structured review and approval process that takes artwork from design to press-ready. Reviewers check copy, color, regulatory content, and production specs on a specific version, and everybody’s got a lane: Design QA, Brand, Legal and Regulatory, Prepress. One person signs off, on the record, on the exact file heading to the printer.
Why print and package review is hard to get right
Screens lie about color
Your monitor is RGB and backlit. Your package is CMYK or spot color sitting on a physical substrate under fluorescent store lighting. Colors shift on press, and if your review never checks separations or ink density, you’re approving a version of the artwork that doesn’t exist anywhere in the real world. It’s a very good guess, but it’s still a guess.
Regulatory text is recall city
This is the big one for packaging. A Loftware analysis of FDA data found label errors were the leading cause of US food recalls in 2024, accounting for 45.5% of recall events and roughly $1.92 billion in direct costs. Industry estimates put the average recall around $10 million before you touch lawsuits or lost sales. Ingredients, allergens, net weight, nutrition, claims. One wrong line equals a recall.
There are a lot of moving parts
Copy, color, dielines, barcodes, regulatory panels, brand marks, production specs. They all have to be right at the same time on the same file. Miss one and the whole run is potentially compromised.
Version control on large files can be a disaster
Print files are enormous, slow to move, and absurdly easy to mislabel. The wrong version going to the printer can be very costly, and it’s a pure process problem. “Finalv3USETHIScarton.pdf” is not a version control system.
If you’re noticing a theme, GOOD. An old regulatory panel, a wrong file at the printer – they’re all process, all preventable, all catchable by a review that’s actually built for print.
The four review stages every print project needs
The biggest mistake teams make is one giant review where Brand, Legal, and Prepress all comment at once and inadvertently contradict each other. You need sequential stages.
Stage 1: Design and Prepress QA. Production team only. Bleed, trim, safe zones, resolution, color setup, dieline alignment. Make sure the file is physically printable before anyone debates the words on it.
Stage 2: Brand and copy review. Brand and Marketing on copy, logo usage, color against brand standards, consistency across the range. A strategy conversation, not a prepress one.
Stage 3: Legal and regulatory. Ingredients, allergens, nutrition, net weight, claims, required warnings, market-specific rules. Its own review with the right eyes on it. This is the stage that keeps you off a recall list.
Stage 4: Final prepress sign-off. Production specs, separations, barcode, file format, and one last confirmation that the approved version is what’s actually going to the printer. Check all of it (yes, all of it).
Print and package proofing checklist: what to check before press
Run this at prepress QA and revisit the relevant bits at each stage. There’s no “fix it later” in print, so there’s no skimming either.
How Ziflow handles print and package review
Print is where Ziflow’s precision tools earn their keep. On proofs built from PDF, AI, or INDD files, switch on color separations (Settings, Proofing Settings, Proof Viewer, Other options, then Create color separations) and reviewers can inspect CMYK and Pantone channels and measure ink density, catching color problems on screen that would otherwise introduce themselves on press. Worth knowing: it’s off by default because it’s resource-hungry, and it lives on Pro, Business Legacy, and Enterprise. The measurement tool lets any reviewer check page size, bleed, and object dimensions in pixels, inches, or millimeters.
When a new version lands, Auto Compare highlights the pixel-level differences between versions. That’s how you catch the regulatory panel that moved when nobody asked it to, or confirm the one correction you requested is the only thing that changed. Honest caveat: Auto Compare reads pixels, not intent, so a deliberately moved element will flag the area around it.
Build a Workflow Template (Settings, Proofing Settings, Workflow Templates) so Prepress, Brand, Legal, and Regulatory run in order, each stage starting when the one before it is Approved. On Enterprise, hang a Checklist on the regulatory stage for the items that actually cause recalls: allergens present, net weight correct per market, claims approved, barcode placed. Reviewers tick those off right where they comment. Ziflow handles big files too, so your high-res production artwork doesn’t need to be squashed into something that hides the problem you’re looking for. And if you live in InDesign, Illustrator, or Photoshop, the Adobe plugin pushes proofs straight from the app.
When it’s right, sign-off gets recorded as a decision tied to a version and a person, with an audit trail. That’s the record you want when a print run gets questioned, or when someone asks how the old panel made it to press. Ziflow gives reviewers separations, measurement, and comparison to catch print issues, but it isn’t a dieline or barcode-validation system. Keep those specialist checks in your prepress process where they belong.
How to know your artwork is ready for press
Artwork is ready when every one of these is true. Every one:
- Prepress has verified bleed, trim, safe zones, resolution, and color setup on the production file
- Color has been checked via separations, not approved on a backlit screen
- Legal and regulatory have approved all copy, claims, allergens, and required text for every market
- Barcodes and regulatory panels are verified against the correct, current data
- Every comment from every stage is addressed and verified
- The file going to the printer is the approved version, correctly labeled
Miss one and it’s not ready.
What we’ve seen at Ziflow
Teams that move from emailed PDFs to structured print proofing catch the same recurring greatest hits before press: the outdated regulatory panel, the color that drifted, the barcode tied to old data, the net weight wrong for one market, the wrong file cheerfully heading to the printer.
The teams that struggle are awash in talent, but they’re approving color on a screen and running version control out of a folder called final.
Build the process before the press run
Print feels high-stakes because it’s permanent, expensive, and sitting on a store shelf where everyone can see it. A consistent review process won’t take the pressure off, but it does mean that when artwork goes to press, you know it got checked properly, in color, against the regulations, every time. Build the checklist into your workflow and make it the standard.
See how print and package review works in Ziflow at ziflow.com/demo.
FAQs
What are the main types of print proofs (PDF, digital, contract, press)?
Same job (see it before you commit), different stages and accuracy levels.
PDF proofs: the everyday workhorse for checking content, layout, and copy on screen. Won't tell you how ink actually sits on the stock.
Digital proofs: soft proofs, often color-managed to simulate output. Fast and remote-friendly, but a monitor is still a monitor.
Contract proofs: calibrated, color-accurate proofs the printer and client both sign off on as the color standard the run has to match.
Press proofs: pulled on the actual press with the real inks and stock. Most accurate, most expensive, saved for high-stakes jobs.
Most projects live on PDF and digital proofs, then bring in a contract or press proof when color has to be locked down.
What is a dieline, and how does it affect packaging proofing?
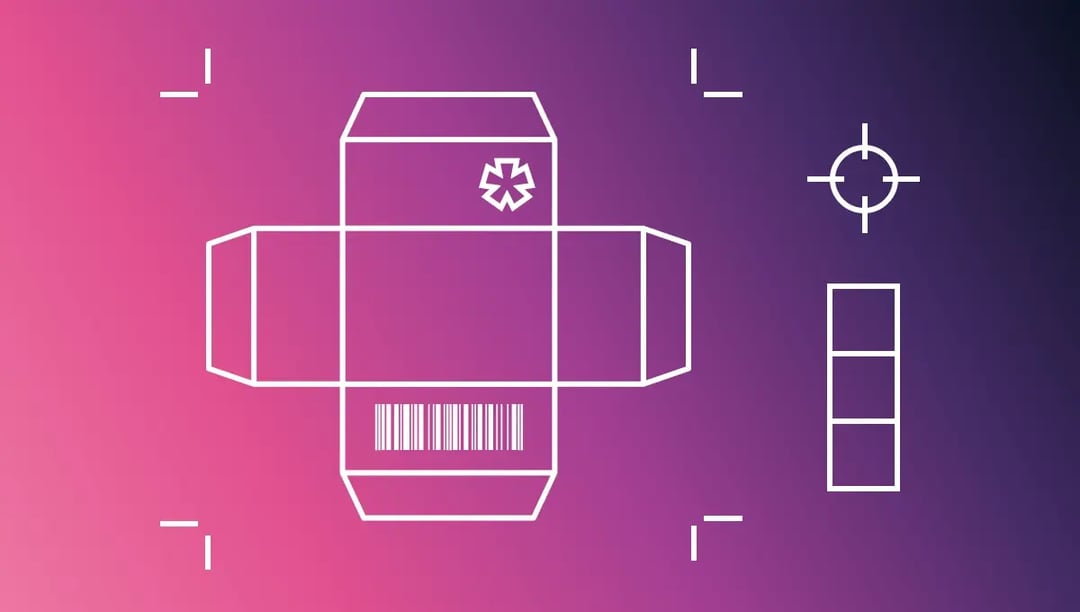
A dieline is the flat blueprint of your package before it's folded, mapping every cut, crease, fold, and glue point.
Packaging isn't a flat rectangle, so your artwork has to line up with a structure that gets folded and stood on a shelf. If a barcode lands on a crease or text ends up on a glue flap, you want to catch it on the dieline, not on a pallet of finished cartons. Proofing packaging means checking the artwork against the dieline: does everything sit in the safe zones, and do the panels read correctly once folded.
What is the difference between a print proof and a packaging proof?
A print proof mostly asks, “Will this look right off the press?” You're checking color, resolution, layout, and content on a flat piece.
A packaging proof has to cover all of that plus a structural and compliance layer:
- Does the artwork line up with the dieline once folded?
- Will the barcode actually scan at the register?
- Is the regulatory text accurate for every market it ships to?
- Do foil, varnish, and embossing register correctly against the print?
Print proofing is mostly about how it looks. Packaging proofing is about how it looks and whether it folds, scans, and complies.
Why can't you approve packaging color on a screen?
Your monitor and your printed package speak different languages. Screens build color with light (RGB); print builds it with ink (CMYK plus spot/Pantone) on a specific substrate. They don't map perfectly, so a color that glows on screen can print flatter or shift in tone.
It gets worse because no two screens match. Ziflow even notes proof colors can vary browser to browser based on how each handles CMYK profiles in JPEGs. That's why final color sign-off happens against a calibrated physical proof, not a screen. Digital proofing is great for layout and copy; color just needs something you can hold up to the light.
What are the most common causes of packaging and label recalls?
Most recalls come from information being wrong, not design looking bad. The usual suspects:
- Missing or incorrect allergen information (a safety issue, not a cosmetic one).
- Wrong or outdated regulatory text that doesn't match current rules in a market.
- Mislabeling (right label, wrong product).
- Incorrect claims that aren't accurate or approved.
- Barcode errors that won't scan or scan as the wrong product.
These are content and compliance failures, which is why review needs regulatory, legal, and brand each checking their piece before print.
How do you proof barcodes and QR codes on packaging?
Carefully, because a barcode that looks fine and one that actually scans are two different things. A proper check covers:
- Encoding: the right data (correct UPC/EAN/GTIN for that exact product).
- Scannability: size, bar width, contrast, and the quiet zone around the code.
- Placement: away from folds, creases, or curved surfaces that distort it.
For QR codes, confirm the code resolves to the right destination and renders cleanly at print size. Best practice is to actually test-scan from the proof rather than trust your eyes. Some packaging tools include built-in scanning; Ziflow's strength is the review-and-approval side (routing, precise markup, versioning), so teams typically pair that workflow with a barcode verification step.
How many review stages should a print or packaging project have?
As many as you need to cover the people who genuinely sign off. A simple print piece might need three: internal creative review, stakeholder feedback, final approval. Packaging usually needs more:
- Internal creative/design review
- Brand review (colors, logo, guidelines)
- Regulatory and legal sign-off
- Final approval before printer handoff
Give each stage a clear owner and job. When Ziflow runs stages sequentially, each opens only after the previous is approved, so regulatory isn't reviewing artwork brand hasn't okay’d yet. Teams that structure stages well hit approval in fewer versions instead of grinding through five or six rounds.
What features matter most in packaging and print proofing software?
The features that catch technical and compliance problems, not just typos:
- Color separation tools: Ziflow's color separation checks CMYK and Pantone accuracy and ink coverage, so brand color doesn't print wrong across a run.
- Precise in-context markup: pinned annotations on the exact spot beat vague email notes.
- Version control and comparison: automatic tracking so everyone's on the latest file and can see what changed.
- Structured multi-stage workflows: route through creative, brand, regulatory, and final approval without skipping a sign-off.
- Automated reminders: nudges that keep reviewers moving so one slow approver doesn't stall a launch.
- Broad file support: Ziflow handles 1,200+ file types, so you're not fighting the tool to open a proof.
Short version: the best print and packaging proofing software catches the costly, technical stuff before the press, not after.

With a track record that spans media giants like WarnerMedia, Viacom, and Google, Aaron's expertise shines through in multi-million dollar projects across various mediums, from traditional television to the dynamic realm of YouTube.